Raspberry Pi as a MIDI Host/Bridge/Router
This is the problem - many newer keyboards do not have 5 pin MIDI sockets and instead use USB to transmit and receive MIDI. This is understandable given many users just use the USB socket on their computer to connect to sequencers etc. The keyboard I'm using is the Yamaha P121 which is the 73 key version of the P125.
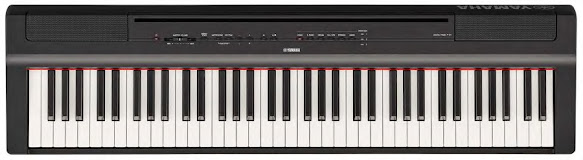

Yamaha P121
As you can see from the rear panel there are no MIDI sockets so cannot be used to play another keyboard or send data to MIDI equipment via 5 pin DIN.
I want to use the P121 to play my Nord Electro 6D. This has the following benefits:
- You can play 2 sounds at once on the Nord without resorting to key splits

- The Electro 6D has a 'waterfall' keyboard whose action and key shape are based on the Hammond organ. This is a very fast and light keyboard actions great for playing organ but the wrong weight and feel for acoustic or electric piano.
- I have the 61 key version limited to 5 octaves so I have to use the octave shift to access notes outside that range.
Both keyboards have a USB Type B socket that transmits MIDI over USB but you can't connect Type B to Type B as they need to connect to a Type A socket of a MIDI Host or Bridge. Now that will usually be a computer which runs a program that can 'see' the keyboards and can receive or transmit data to these keyboards. But I don't want to use a computer for just a simple task.

Setup
I am running 32bit Raspbian on a Pi3B. It's in a nice enclosure and has 4 USB ports. I have installed the ASLA Midi library.

In a terminal window on the Pi enter:
sudo apt-get aslamidi
Once that is installed connect up both keyboards and type:
aconnect -l
That should list the port number and name of the device. In my case the P121 was listed as Digital Piano and the the Nord as Nord Electro 6. So just enter:
aconnect 'Digital Piano' 'Nord Electro 6'
This will route MIDI from the P121 to the Nord and you just have to match the MIDI channels.
Running Headless
I wanted to automate this and have the option of not using any peripherals. So in the local file I added the line above. Open the editor:
sudo nano /etc/rc.local
Then added this line at the end and saved it.
aconnect 'Digital Piano' 'Nord Electro 6'
When I disconnected the monitor the Pi just hung so after googling the problem I adjusted the Default Resolution to 800x600 by editing the config file.
run terminal and type
sudo raspi-config
reboot
Go to: >Advanced Option > Resolution > just set your resolution compatible fit with your screen.
then
If you didn't found the menu on configuration, please update your raspberry pi software configuration tool (raspi-config).
Final thoughts
A Pi3B and case cost around £30 and is a simple solution. It's small and just needs a PSU and 2 USB cables. Further devices could be added and by swapping out the Micro SD and I can still use it as a Media Server. It hasn't been thoroughly tested but has been booted successfully several times - watch this space.......
After several months I have had no issues running the Pi as router. If you are Pi savvy this is a great solution!!
Comments